Hi All,
In 2014, I
did a migration of SharePoint 2010 to SharePoint 2013. In this
blog post I am detailing a step by step steps along with the gotchas and fixes.
Let’s summarize what we are going to do:
Installation
and Configuring SQL Server 2012 (or SQL Server 2014) with latest patches.
·
Installation
and Configuring SharePoint 2013 with latest patches.
·
Installation
and Configuring SharePoint 2013 custom third parties.
·
Migrate
SharePoint 2010 Services Applications to SharePoint 2010 Services
applications
·
Migrate
SharePoint 2010 content databases to SharePoint 2013
Overview
New Migration strategy of SharePoint 2010 to SharePoint has
been changed. Now, there is no in-place upgrade and only database attach
is supported in this version unlike previous versions. Following steps will be
performed in this blog post:
- Creating SharePoint 2013 Farm. (Farm Admin)
- Copying databases from SharePoint
content and services application databases to new SQL Server
2012 database. (Farm Admin)
- Upgrading service applications. (Farm
Admin)
- Upgrading content databases. (Farm Admin)
- Upgrading individual site collections. (Site
Collection Admins/Owners)

I will be breaking the blog posts into 6 pieces :
- Installing and SQL Server 2012 (or 2014) in the new SharePoint Farm (This blog Post)
- Installing and Configuration SharePoint Server 2013 for migration
- Configure Firewall
- Migrate SharePoint 2010 Service Application databases to SharePoint 2013 with Testing
- Test SPContentDatabase and Mount Databases
- Upgrade site collections
Step1: Installing
and Configuring SQL Server 2012 (or 2014) in new SharePoint 2013 Farm
1.1 The first step is to install the SQL
Server 2012 on Windows Server 2012 server. Following steps will show step by
step installation guide along with Configuration.
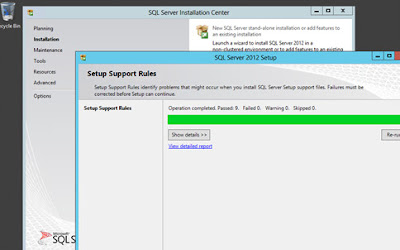

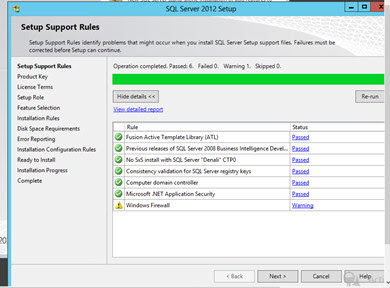
1.5 Setup
Support Rules gives a warning for “Windows
Firewall”. Please note that the firewall configuration will come configured
later at later stage. Click “Next” to
proceed.

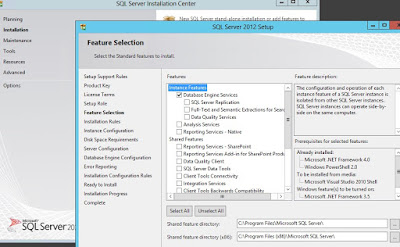
1.9 In
the “Feature Selection” screen check
the “Database Engine Services” and “Management Tools” and proceed:

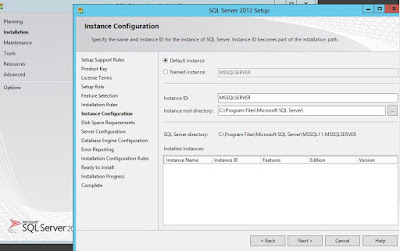
1.11
In the “Instance
Configuration” wizard (or you can create a named instance as well), keep the default settings and click “Next” button.

1.13
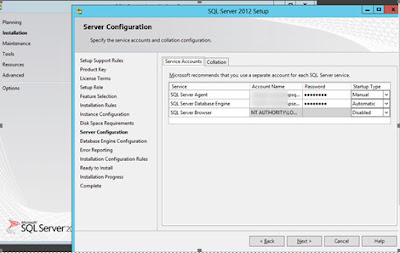
In the “Server
Configuration”, under Service type in “contoso\sp_sql” that is
required for SharePoint SQL Service Account and click “Next” button.

1.14
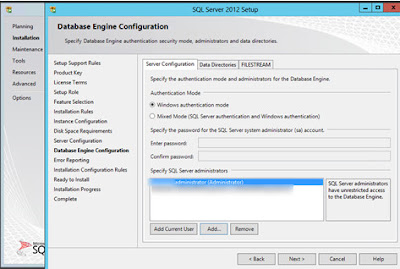
In the “Database
Engine Configuration” wizard, the default account is contoso\administrator.
Add the “contoso\sp_admin” account and click “Next” button.

1.18
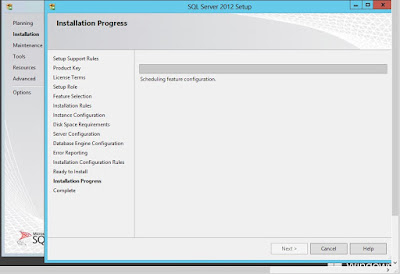
In the “Installation
Progress”, the set schedule selected features as mentioned above and
necessary components

1.20 Open the SQL Server Configuration Manager.
1.22 In the “SQL Server Network Configuration”, enable “TCP/IP” as shown below:
1.23 Open the SQL Server Management Studio as administrator. The SQL Server 2012 in now and running.
Please comment if this blog post is helpful.
--aaroh :)


No comments:
Post a Comment