Hi All,
We are running App in a Day- Hindi (हिन्दी) edition and it started on 04 Sept 2021.
You can access the video here
Here are step by step for Lab 1 which can be downloaded from here
Exercise 1: Create app in Power Apps
TASK 1: Sign-in to Power Apps web studio
- Go to Power Apps and click Sign-in. You may also directly navigate to Make Power Apps.
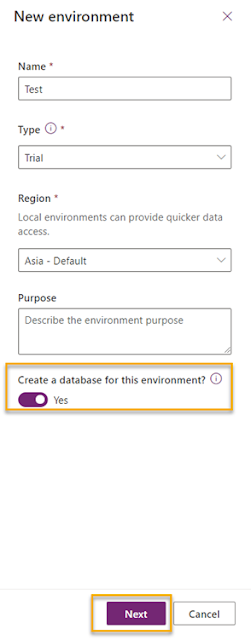
- Before creating an app, let’s switch to the correct environment.
- Click the Environment drop-down in the top right of the screen to switch to the new environment.
- Select the language, currency and click on Save button,

Task 2: Create a new application
- Create a new App from make.powerapps.com. Ensure you are in correct environment.
- Select Canvas app from blank

- Name the app name

Task 3: Rename the screen

Task 4: Add a header containing the app name and logged in user’s name

- Center align just like word and use fill to look a like a header.

- Add another label and use User Function to greet the user

- Add user image by user image by using Media

- User the User image as follows:

Task 5: Save the Application
- Select File >> Settings >> Give name of app
- Save the app

Exercise 2: Add Device Gallery and Connect to Data Source
Task 1: Add device gallery


Task
2: Arrange the device gallery
- Resize and reposition the gallery. You can drag and drop the gallery or use the gallery properties pane on the right.

- Select the Device Gallery and click the Edit (pencil) icon

- Using the right drag control, resize the first box to be narrower


Task 3: Add Gallery to show manufactures
- Add a vertical gallery and name it as galManufacturers

- Adjust gallery's layout to image and title

Task 4: Connect Manufacturer Gallery to manufacturers table


Task 5: Highlight the selected item in the gallery
- Select the galManufacturer, the TemplateFill property on the gallery as follows
If(ThisItem.IsSelected,LightBlue) - Manufacturer logo is selected


Task 6: Filter the devices based on selected manufacturer


Task 8: Conditional formation to highlight devices above $1,000


Task 9: Add a checkbox to add a device to Compare list


- Select the Checkbox control and click on the Action
Collect(colCompareList, ThisItem)
- Add a sample horizontal gallery

- Connect colCompareList to this sample Gallery and place at bottom.
- Check 2 items from Device Gallery and sample Gallery is also selected.

- Select OnUncheck and use Remove function
Remove(colCompareList,ThisItem)

Task 1: Add screen
- Delete Manufacturer name from template cell

- Adjust the template cell

- Add a new blank screen

- Add a button in first screen and button name it appropriately.

- Add a logic in button
"Compare " & CountRows(colCompareList) & " item(s)"

- Add a navigation property to compare screen
Navigate(ScrCompareScreen,ScreenTransition.Cover)

- Add a logic of end user does not select any laptop. Then you should not go to compare screen.
If(CountRows(colCompareList)>0, DisplayMode.Edit, Disabled)

- User can add many laptops. You should have an option to clear the shopping cart. Add a button and use OnSelect Clear(colCompareList)
Clear(colCompareList)

- Run the app and test the Clear Selection and Compare buttons
"Compare " & CountRows(colCompareList) & " item(s)"
Navigate(ScrCompareScreen,ScreenTransition.Cover)
If(CountRows(colCompareList)>0, DisplayMode.Edit, Disabled)
Clear(colCompareList)
Task 2: Configure the gallery


Task 3: Remove and add controls to the gallery
- From main screen, copy the header
- And paste to compare screen

NOTE: Best is it use Components.
Find an excellent video on Components by Reza Dorrani (Microsoft MVP) - Copy other labels within template cell.


Task 4: Highlight the selected device
- You can reuse the same conditional formula that you have used in the main screen.

- Both conditional formatting

and currency format have been copied

- You can do the same copy paste for entire galleries.
- For SrcMain, Select galManufacturers, use TemplateFill property copy this code
If(ThisItem.IsSelected,ColorFade(lblHeader.Fill,75%))

- In galSelectedLaptops gallery, paste the same code:
If(ThisItem.IsSelected,ColorFade(lblHeader.Fill,75%))

and currency format have been copied
If(ThisItem.IsSelected,ColorFade(lblHeader.Fill,75%))
If(ThisItem.IsSelected,ColorFade(lblHeader.Fill,75%))
Task 5: Add an icon to navigate to the first screen
- Add icon for ScrMain screen

- Use OnSelect property with function Back()

Task 6: [Optional] Share the application with a colleague
- You can share your app with your teammates

- You can make the person co-owner and share the app.

Stay tuned for next Episode on 18 Sept 2021 which will be Microsoft Dataverse
Keep Learning
--aaroh


