Sunday, April 3, 2016

Migrate SharePoint 2010 to SharePoint 2013 step by step - Part 6 Upgrade site collections

This is ongoing Migration SharePoint series.

I will be breaking the blog posts into 6 pieces :


In this final step, upgrade the SharePoint 2010 UI to new SharePoint 2010 UI with added features. To perform this, we need to upgrade each site collection and My Sites.    

Upgrade top level site collections

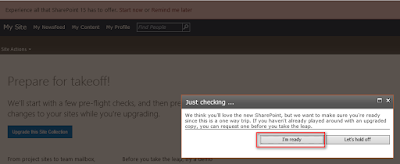
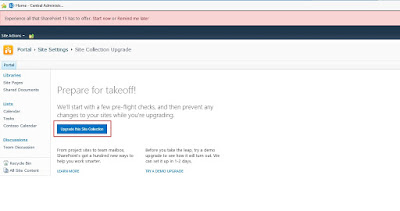
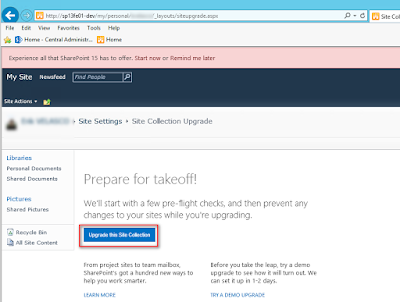
  1. On top level site, we will see a top bar with pink in color stating “Experience all that SharePoint 15 has to offer. Start now or Remind me later ”  as shown below:

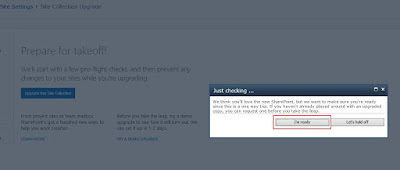
  2. Click on “Upgrade this site collection”:
  3.  Click on “I’m ready” and proceed

  4. In this step, site collection will perform health checks:
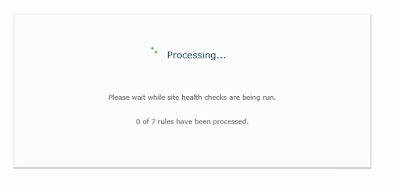
  5. It has to note that health checks may take 2-3 hours (depending on size of content database)and at the end shows an error if any. There are features in SharePoint 2013 that have been deprecated and does not work. If any errors happen, we have to fix the issue first and run the upgrade wizard.


    Click here 
    Discontinued features and modified functionality in Microsoft SharePoint 2013

    Note:
     
    You might get some errors while upgrading site collection, even though out of box features are broken in SharePoint 2013. This my question that I asked in Social MSDN SharePoint Forum  

    These are the steps to fix it my environment:1. Renamed the default Video content type as above so it it does not conflict. (Did not use any third party solution though)
    2. 
    Restarted the SharePoint 2013 timer service.3.Restarted the IIS.4. Ran the Site Collection upgrade.5. The site collection upgrade was successful.

Upgrade My Site Host

TechNet suggest to upgrade My Site host first and subsequently personal site collection: 

  1. Start with My Host site collection as shown:
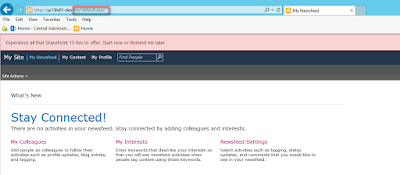
  2. Click on “I’m Ready” button.

  3.  The upgrade site collection kicks in and will take few seconds/minutes to successfully upgrade.
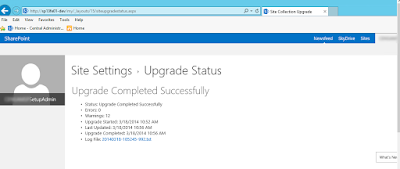
  4. New social features such as Following, mentions is  available immediately.
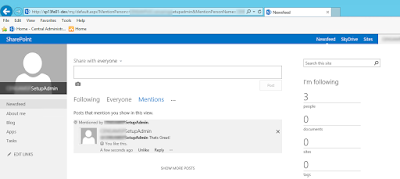
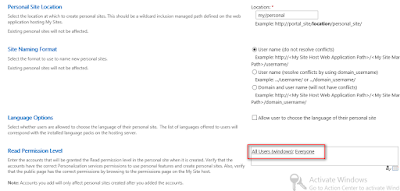
  5.  Next, you need to configure My Site settings as shown:
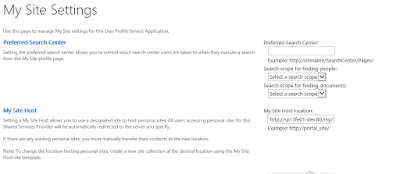
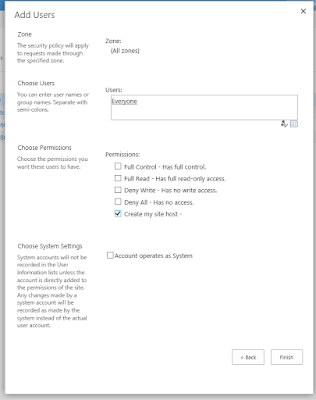
  6.  Set the read permission for Everyone.

  7.  As you might have some few newsfeed activities in SharePoint 2010, you MUST check Enable Activities in My Site newsfeed and Enable SharePoint 2010 activity migration.
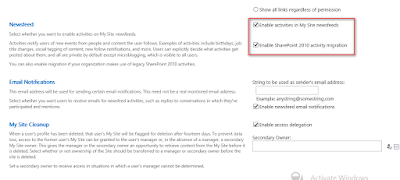
  8. SkyDrive (now OneDrive SharePoint 2013 SP1 March CU onwards) option is available.  


    Now, you can upgrade each personal site as below steps. 

  9. Start with user’s personal site collection
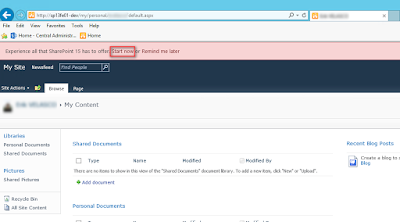
  10.  The upgrade site collection kicks in and will take few seconds/minutes to successfully upgrade.
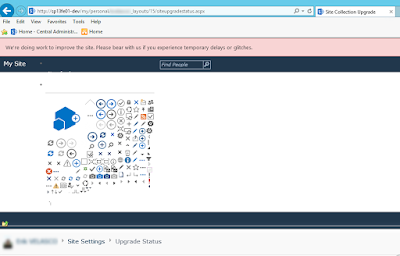
  11. Please note during upgrade process you might get weird messages and it will be fixed when site completely upgraded
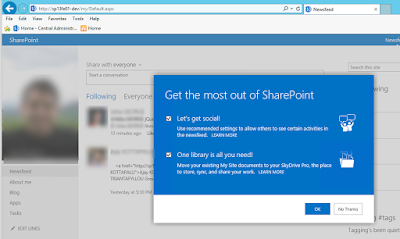
  12. New social features such as Following, mentions is  available immediately.

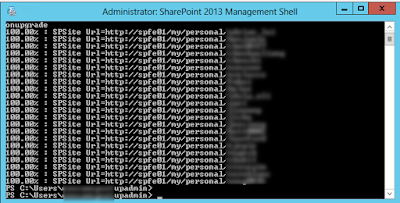
  13.  However, if you have only few 3-4 user profiles, above process is fine. But if have more profiles, use another approach using PowerShell. Use all personal profiles which is shown here:


  14. Upgrading the My Site Host using PowerShell

    Upgrade-SPSite << http://MySiteHostURL >> –versionupgrade
    http://MySiteHostURL is the URL of the My Site Host.
  15. Upgrading the personal site collection using PowerShell

    Get-SPSite -limit all |where {$_.CompatibilityLevel -eq '14'} | where {$_.RootWeb.WebTemplateId -eq  21} | upgrade-spsite –versionupgrade 


    Migrate all users SharePoint 2010 windows authentication to Claims authentication
    SharePoint 2013 authentication is  claims and unlike SharePoint 2010 which is Windows authentication.

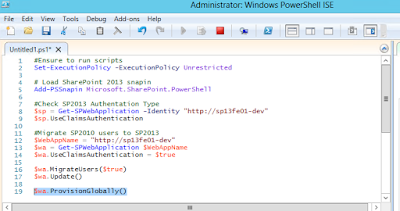
    You need to perform a simple step migrate all users


    Please comment if this blog post is helpful.

    --aaroh :) 
    References: 

    a) TechNet Upgrade My Sites to SharePoint Server 2013
    b) Upgrade My Site host and personal site collection
    c) Migrate SharePoint 2010 users to SharePoint 2013


Migrate SharePoint 2010 to SharePoint 2013 step by step - Part 5 Test SPContentDatabase and Mount Databases

This is ongoing Migration SharePoint series.

I will be breaking the blog posts into 6 pieces :


Test the Content Database


It’s very important to test the database as its checks the any inconsistencies in database, orphan files, features not supported and any third party solutions. 

1.       Click open the SharePoint 2013 Management console in the SharePoint 2013 environment as shown


2.       Run the PowerShell to test the database as follows:

Test-SPContentDatabase -Name WSS_Content -WebApplication http://sp13fe01-dev | ConvertTo-CSV | Out-file “D:\Migation\WSS_Content_2357.csv”

   
3    The above command will take a couple of minutes and check if any issues happened. The main issues are because due to third party solutions. Remove the references in the content database PowerShell commands and run the “Test-SPContentDatabase” till we zero errors in this command.

However, when you migrate SharePoint 2010 content database to SharePoint 2013 content database, there will be some MissingFeatures, MissingSetupFile, MissingWebpart and MissingAssembly.

Fortunately, some experts have already written PowerShell to fix the issues.
a) MissingFeatures PowerShell here, and sample here.
b) 
MissingSetupFile PowerShell here, and sample here.
c) 
MissingWebpart  PowerShell here, and sample here.
d) 
MissingWebpart  PowerShell here, and sample here

 
4.       Once we verified that there are no errors in the Test database, run the Mount database as follows:
Mount-SPContentDatabase -Name WSS_Content –WebApplication http://sp13fe01-dev


5.  The mount command might take a more than 1 hour. 
6. Once you have Mounted the SP2013 content database, you can check the upgrade status.


Please comment if this blog post is helpful.

--aaroh :) 


Migrate SharePoint 2010 to SharePoint 2013 step by step - Part 4 Migrate SharePoint 2010 Service Application and Content Databases to SharePoint 2013
This is ongoing Migration SharePoint series.

I will be breaking the blog posts into 6 pieces :


Install and Configure SharePoint Server 2013’s third party
After you have configured the fresh SharePoint Server 2013, next step is to install all third parties with SharePoint 2013 version and used by SharePoint Server 2010. If you have already had SP2010 third party solutions, you need to install new version of corresponding third party solutions as old solitons won’t work. You MUST install ALL third parties solutions before you migrate any service applications.    

Overview:

After the new SQL Server 2012, SharePoint Server 2013 and third parties have been installed on SharePoint Server 2013, the next step it migrate the leveraged the database-attach method as followed:

  1. At this stage of migration, you copy the SP2010 database to the new SQL Server 2013 database. With the farm and databases in read-only mode, a farm administrator backs up the content (WSS_Content) and service application databases (MMS, UPS etc) from the SQL Server instance on the SharePoint 2010 Products farm.

    For e.g. You can navigate to the WSS_Content >> Right click >> Properties >> Under Select a page select Options >> Under State heading, drop down to False for Database to read only as shown:


  2. The farm administrator restores a copy of the databases to the SQL Server instance on the SharePoint 2013 farm and sets the databases to read-write on the new farm.
Migrate SP2010 content database to new SP2013 content databases


The main content that users would be using is the SharePoint 2010 content database that contains all documents, lists, pages, Wikis, Blogs and third party solutions. It’s very important to install all third party solutions to latest versions for SharePoint 2013 and install same third party solutions on the SharePoint Server farm.
Even if a single third party in not installed, we may not upgrade to SharePoint 2013.    


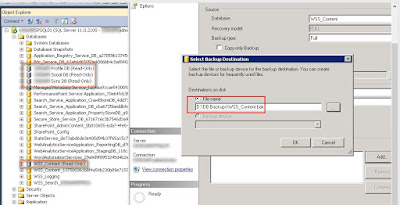
1.       Navigate to the SP2010 databases; right click the database open in “read-only” mode. Right click again and choose “Tasks” >> “Back up…” 


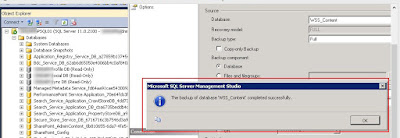
2.       Click OK button in above screen and SQL Server would process to take a backup of database and prompt as shown below.


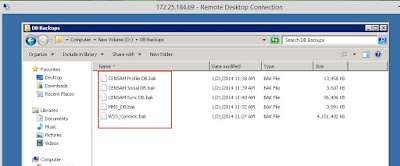
3.       Perform steps similar Step1 and Step2 for MMS and UPS databases and keep into a shared drive as shown: 


4.       On the SQL Server 2012, “Restore” the old SP2010 databases as shown:


5.       Now, navigate the shared DB backups that we shared in step 3, click “Add


6.       Locate the restored databases and click OK button.


7.       The database engine will process


8.       The database engine will process and restore the database on new SQL Server 2012 as shown.


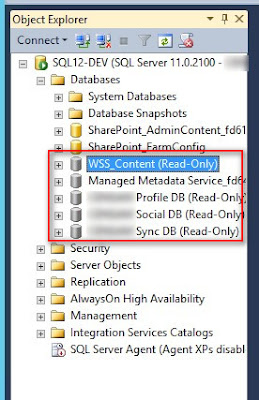
9.       All the databases have been restored; the database will be on read-only state as shown below
Make the database read-write by clicking options for each database.


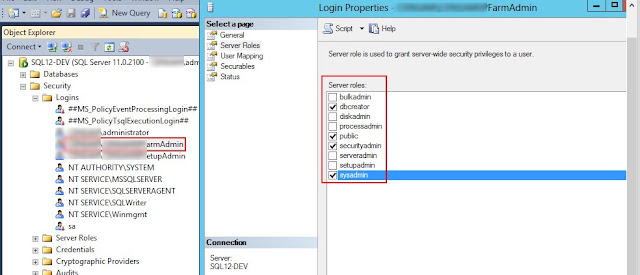
On the SQL Server 2012 Management Studio, click on “Security” for “sp_farm” account and check following roles:


 Perform same steps for “sp_admin” account.


Migrate Management Metadata Service from SP2010 to SP2013


This is the process to upgrade service application databases into working service application require four major steps, described as follows:


1.       Start the service instances.

2.       Create service applications and attach the SP2010 databases.

3.       Create proxies for each service application.
Verify that proxies reside in the default group.

First you migrate the MMS service application from SP2010 to SP2013.


1.       Open the SharePoint Server 2013 Central Administration  and click on “Manage services on server”


2.       The managed metadata service is stopped as shown.


3.       Click on “Start” link to start the MMS application on the Server


4.       Click open the SharePoint 2013 Management console as shown


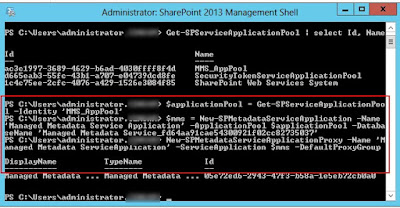
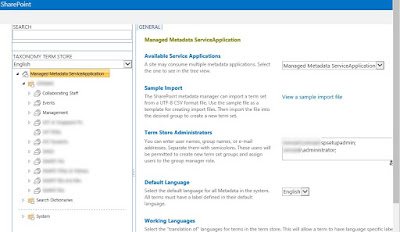
5.       Next, attach the Management Metadata Service database using PowerShell as shown:


NOTE: Find the Managed Metadata PowerShell text file here.


6.       Open the SharePoint Server 2013 Central Administration  and click on “Manage services on server


The SP2010 management metadata service is now migrated to SP2013 environment successfully.


7.       Verify the upgrade status in the Central Administration


Migrate User Profile Databases from SP2010 to SP2013


User profile has three databases that we have restored from SP2010 to SP2013.
The important aspect here that we have to import MIIS Encryption key has to be backed up on the SP2010 server and use it on the SP2013 environment. Another important is that User Profile Service Application has to be used in farm account.     

1.       Open the SharePoint Server 2013 Central Administration  and click on “Manage services on server”


2.       The User Profile Service is stopped as shown. Click the “Start” the service.


3.       Click open the SharePoint 2013 Management console as shown


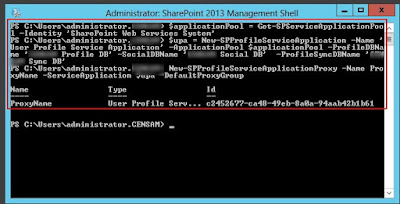
4.       Next, attach the User Profile Service database using PowerShell as shown:

NOTE: Find the User Profile Service PowerShell text file here.

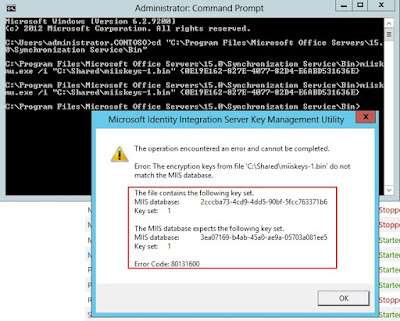
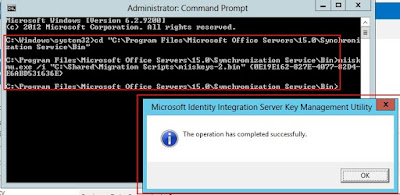
5.       Import the MIIS Encryption key from SP2010 server and export it in SP2013 server for UPS as shown:


6.       Once the key is imported, click on the User Profile Synchronization Service as shown


It might take some time 5-10 minutes to start the service. Once the its started, the UPS application page will be shown up:


Service State Workflow.

Now, at the time If you open any list you might get this error while adding new item.

 
Error
: The form cannot be rendered. This may be due to a misconfiguration of the Microsoft SharePoint Server State Service. For more information, contact your server administrator


It turns out that
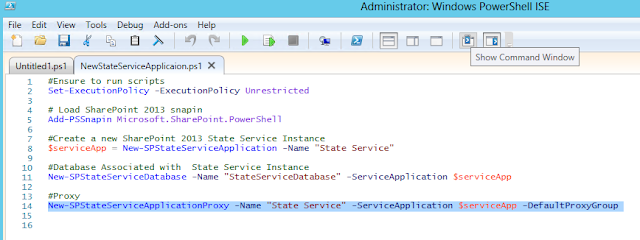
Workflow requires State Service service application to function. Thus, a new instance of State Service Application is required. I used PowerShell to provision:


PowerShell Text:

1. $serviceApp = New-SPStateServiceApplication -Name "State Service"
2. New-SPStateServiceDatabase -Name "StateServiceDatabase" -ServiceApplication
$serviceApp
3. NewSPStateServiceApplicationProxy -Name "State Service" -ServiceApplication 
$serviceApp -DefaultProxyGroup 


You can see new instance of State Service in the service application as shown:


and new State Service has been created in SQL Server:


Troubleshoot

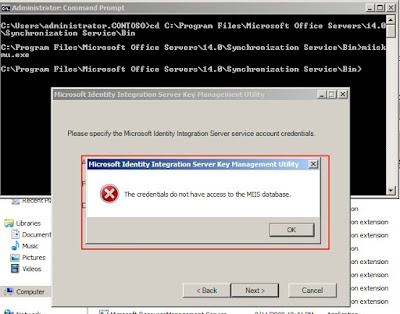
The User Profile Service requires farm account. When we export the MIIS encryption key as “contoso\administrator” we get following errors:


Creating a port 80 Web Application in Central Administration

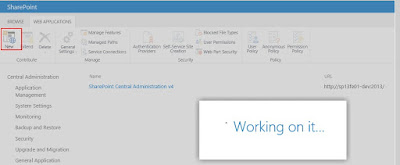
1.       We need a new Web Application besides Central Admin with a temporary database which we will delete later.


2.       Enter the new IIS Web Site, Port etc.


3.       Create a new application pool, corresponding application pool identity and database name to be WSS_Content_TEMP


The web application will be created in few seconds. 

Creating managed paths:

In SP2010 user profile requires managed paths. We need to create managed paths on SharePoint 2013 port 80 web application. It will used by user profile service application. 


Configure MySite Permissions: 

1.       You need to configure MySite permissions as follows.
a.       Select  SharePoint – 80 web application, click on Self-Service Site Creation

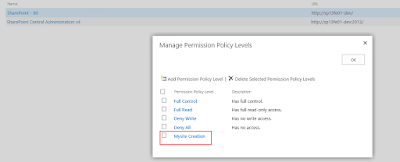
b.      Create a new Permission level named: MySite Creation

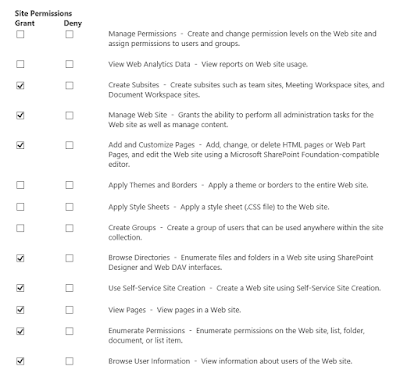
c.       Check following Site Permissions: Create Subsites,  Manage Web Site, Add and Customize pages


d Assign permission policy to Everyone.


Please comment if this blog post is helpful.

--aaroh :) 


Low Code Reimagined with AI + Copilot Pitch Deck - Copy Copilot day (Virtual) - 2023

 Hi All,  I presneded a session at Pune UG on Low Code Reimagined with AI + Copilot Pitch Deck.  Video is at this address  https://www.youtu...