Hi all,
In this blog post, I am going to walk through configuring "My Sites" and its intricacies. If we are able to successfully configure User Profile Service Application, "My Sites" would be much simpler. Lets get started.
Step1:
Add user details in AD
In my previous blog posts, I have added 3 users just for the demonstration purposes. These are user details:
We have to navigate to the Active Directory Users and Computers console and edit user details as shown:
 Right click on the user, go to Organization tab, enter the job title and the manager by clicking in "Change" button and browse the manager. In my case I have entered "Ishan Shukla" as my manager.
I will do same actions with other users. Finally, I key in "Ishan Shukla" job title. We will notice that AD automatically assign Ishan as manager of Aroh and Aman (Directly reports).

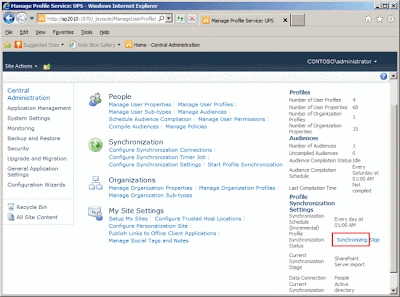
Step 2:
Run the Incremental Synchronization
We need to go to Central Administration >> Application Management >> Manage Service Applications >> UPS >> Start Profile Synchronization >> Choose Start Incremental Synchronization.
In my previous blog post, I indicated for any new updates from AD we can perform this option.

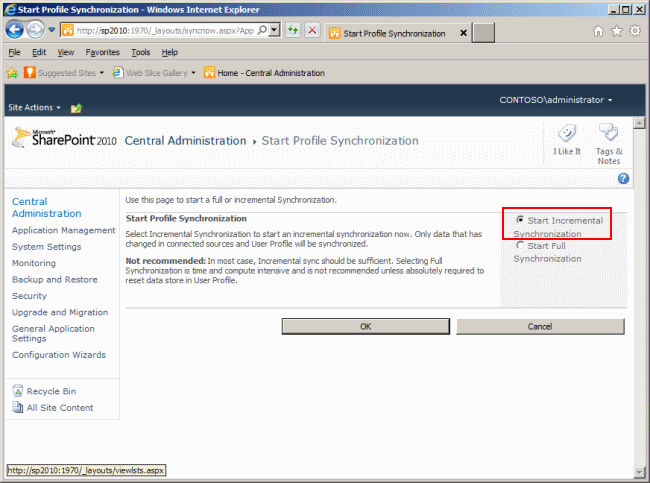
Step 3:
Run the Profile Synchronization
We have to the profile synchronization service again to pull latest entities in AD.
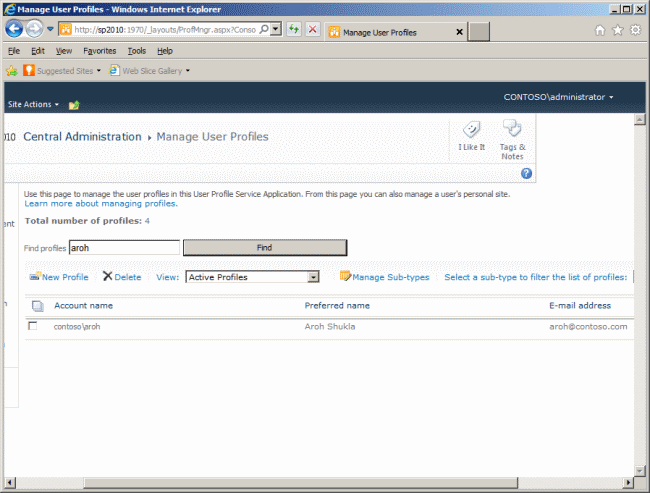
 Once the Synchronization status is "Idle", we have to check if user details are populated successfully. Go to "Manage User Profiles", look for a user profile and click on the "Find" button. Once user is selected, go to "Edit My Profile".
We will notice that Title and Manger fields have been updated in SharePoint too.
Step 4:
Setting up the My Sites
We click on link "Setup My Sites" under "My Site Settings". Please note that "My Sites" is part of User profile service application.

We have not set up preferred search center yet, but we can put it blank. In the section "My Site Host", I have put following URL: http://sp2010:80/my/ and specified personal site location as my/personal
 We also have to specify the "My Email" Notifications email address. For my demonstration, I entered administrator@contoso.com and clicked OK button.
Note: I found a well detailed article from George and he has explained everything very clearly. He has leveraged an Enterprise Template while creating Site Collection and used managed path. I recommend to visit his blog.
Step 5:
Configure Trusted Host Locations:
We need to configure the trusted host location.
 Click on the "New Link"
 We have to supply URL http://sp2010:80/my/ and the description.
 One last point I would like to highlight is that we can manage user permissions (under People):
 Those two accounts can do everything when it comes to SharePoint 2010 social features.
i) User Personal Features - SharePoint sites and distribution lists, my colleagues and colleagues recommendations, My Links and My Personalization Links etc
ii) Create Personal Site - Creates a "My Site" website that includes private home page and public profile page.
iii) Use Social Features - Use of tags, note board and ratings.
These permissions are important because we can give permission to specific set of users.
I have given permissions to users. For Ishan, I have given Site Owner permission on the top level site and Aman Visitor permission.
Step 7:
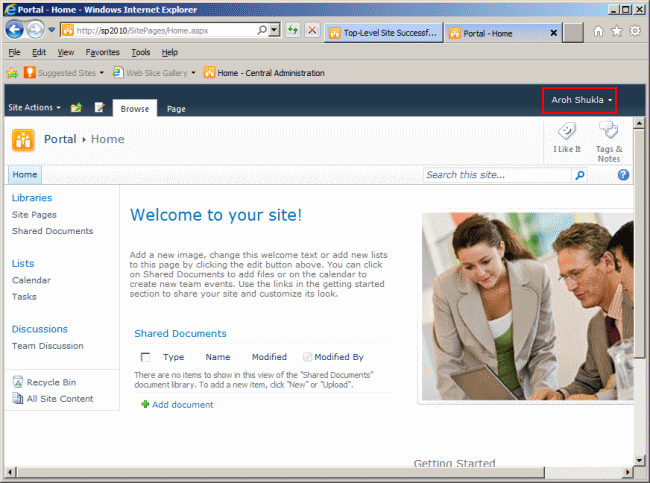
When Aman log into SharePoint site, a message is shown

In few seconds My site is provisioned as shown below:
 When user clicks on Organization tab and warning is shown to user.
 After running the Silverlight, we can view shiny Silverlight user interface.
 When we click on "Edit My Profile", we are able to view all the SharePoint social fields (specifically in Newsfeed section) such as:
Tagging with my interests, rating, status message, tagging colleague, note broad post, birthday, new colleague and profile update. Features are similar as Facebook.
 There is also a twitter functionality:
 I noticed that, we go to "Content" tab and it display a message like "User is not sharing any documents at this time."

Later I realized that I should go to "My Content"and displayed this message

and finally it showed up on the my "Content"
 I hope this walk through was useful for you.
Cheers,
Aroh
References:
George blog
TechNet (Very Detailed and covers multiple farm configuration)
In this blog post, I am going to walk through configuring "My Sites" and its intricacies. If we are able to successfully configure User Profile Service Application, "My Sites" would be much simpler. Lets get started.
Step1:
Add user details in AD
In my previous blog posts, I have added 3 users just for the demonstration purposes. These are user details:
User
|
Job title
|
Manager
|
Aman Shukla
|
SharePoint Designer
|
Ishan Shukla
|
Aroh Shukla
|
SharePoint Developer
|
Ishan Shukla
|
Ishan Shukla
|
CEO
|
Manages 2 users
|
We have to navigate to the Active Directory Users and Computers console and edit user details as shown:

I will do same actions with other users. Finally, I key in "Ishan Shukla" job title. We will notice that AD automatically assign Ishan as manager of Aroh and Aman (Directly reports).

Run the Incremental Synchronization
We need to go to Central Administration >> Application Management >> Manage Service Applications >> UPS >> Start Profile Synchronization >> Choose Start Incremental Synchronization.
In my previous blog post, I indicated for any new updates from AD we can perform this option.
Step 3:
Run the Profile Synchronization
We have to the profile synchronization service again to pull latest entities in AD.

We will notice that Title and Manger fields have been updated in SharePoint too.
Step 4:
Setting up the My Sites
We click on link "Setup My Sites" under "My Site Settings". Please note that "My Sites" is part of User profile service application.

We have not set up preferred search center yet, but we can put it blank. In the section "My Site Host", I have put following URL: http://sp2010:80/my/ and specified personal site location as my/personal

Note: I found a well detailed article from George and he has explained everything very clearly. He has leveraged an Enterprise Template while creating Site Collection and used managed path. I recommend to visit his blog.
Step 5:
Configure Trusted Host Locations:
We need to configure the trusted host location.


i) User Personal Features - SharePoint sites and distribution lists, my colleagues and colleagues recommendations, My Links and My Personalization Links etc
ii) Create Personal Site - Creates a "My Site" website that includes private home page and public profile page.
iii) Use Social Features - Use of tags, note board and ratings.
These permissions are important because we can give permission to specific set of users.
I have given permissions to users. For Ishan, I have given Site Owner permission on the top level site and Aman Visitor permission.
Step 7:
When Aman log into SharePoint site, a message is shown

In few seconds My site is provisioned as shown below:


Tagging with my interests, rating, status message, tagging colleague, note broad post, birthday, new colleague and profile update. Features are similar as Facebook.


Later I realized that I should go to "My Content"and displayed this message
and finally it showed up on the my "Content"

Cheers,
Aroh
References:
George blog
TechNet (Very Detailed and covers multiple farm configuration)


