Hi all,
We have seen quite a few posts on SharePoint 2010 regarding Client object model. They come in 3 flavors:
- JavaScript/ECMAScript
- .NET
- Silverlight
In this article, we will focus on Silverlight. The Silverlight applications leverage a powerful development platform to create rich internet applications (RIA) for web or desktop. Silverlight client object model can use an ASPX page or in web-part. SharePoint 2010 has come with Silverlight web part which comes as wrapper. The web part can have custom properties that could be sent to Silverlight via the "InitParamertes" property. The XAP file can be deployed to Layouts.
The XAP file has to be deployed on the SharePoint 2010 server and it can be done two ways:
- Create and develop an Silverlight application, Go to SharePoint 2010 site >> Edit >> Insert >> Web Part >> Under categories, choose "Media and Content" >> Silverlight Web Part >> Add >> Navigate to the XAP file, click OK button and our web part has been created. Its an easy approach to wrap Silverlight file as a web part. But as from developer perspective, we should add XAP file in a SharePoint solution (WSP). For this web part, we have to set only one property named: URL.
- Create and develop an Silverlight application, create a SharePoint 2010 solution (WSP) and deploy this solution to Central Administration. In this manner, we could able to activate and deactivate features. Therefore, its easy to manage solutions.
In SharePoint 2007, there was not much support to interact with Silverlight and interactions were server side only. In new SharePoint 2010 paradigm, Microsoft has introduced client object model and Silverlight could be on client side. Developers can develop more build advanced Silverlight (SL) applications easily. Furthermore, we can have SL applications that is connected to SharePoint 2010 that doesn't run outside the browser. If you have a look on new SharePoint 2010 interface, there are few SL application popping up and its not required to install light on client's browser. If on client's machine there is no SL installed, SharePoint 2010 will "fall back" into basic HTML and prompt will be shown to end-users to install SL which has richer user interface. Examples:
- Create Dialog
- Visio Services
- Office web applications etc.
Examples:
i) Create Dialog:
An example where client's browser doesn't have Silverlight installed and SharePoint prompts user to install Silverlight:
After user installs SL, navigate to Site Actions >> More Options >> We will get nice rich Silverlight application with animation and we search for a particular list on top right:
ii) Out-of-the-box Visio Services in SharePoint 2010.
SharePoint 2010 has come up with new Visio workflows through which end users can visualize the steps and they can also able to view the status interactively. I will explain this in a upcoming post about the Visio services workflows.
During the development, I observed that when you write Silverlight applications, there is nothing SharePoint special here. We just need to add 2 references:
- Microsoft.SharePoint.Client.Silverlight
- Microsoft.SharePoint.Client.Silverlight.Runtime
This is first step. Lets create a simple Silverlight application where we create a button named Load. When user clicks on "Load" button, it will show all the lists where list title is not hidden. Its to be noted, we are using option 1 where we write Silverlight application, use SharePoint 2010 to upload this SL application as web part. In next article, I will show to wrap XAP file as a SharePoint solution.
Step1: Fire up VS2010 New Project >> Visual C# >> Choose Silverlight template >> Silverlight application >> Click "OK" button
Step2: Silverlight configuration
When we click OK button, a pop comes up where we have to host Silverlight application in a new web site. Simply click OK button and leave all the options as default.
Step3: Two projects are created by default. First project "SilverlightOM" has two important files "App.xaml" and "MainPage.xaml". We need add two references to for SharePoint's client object model.
Second project has following structure:
>> Folder ClientBin: Output of XAP file.
>> Javascript file: Silverlight.js
>> ASPX page: SilverlightOMTestPage.aspx (Test aspx page. Also prompts user if the page requires Silverlight)
>> HTML page: SilverlightOMTestPage.html (Test html page. Also prompts user if the page requires Silverlight)
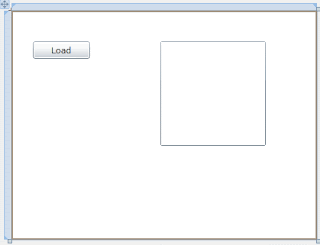
Step4: We work on MainPage.xaml and drag two controls. A button and listbox on the designer surface.
Step5: We double click on the "Load" button. The get the current site context has been retrieved and we use SharePoint's client object model. A variable declared named "nonHiddenListsQuery". We have to use lambda expressions to query lists where title is not null. ExecuteQueryAsync method has been executed with two functions. "DisplayInfo" method just loop through all the lists which are not hidden.
Step6: Build the solution and we will get a XAP file under ClientBin folder.
Step7: Go to SharePoint 2010 site, navigate to Shared Documents, and upload the XAP file.
Step8: Go to SharePoint 2010 site >> Edit >> Insert >> Web Part >> Under categories, choose "Media and Content" >> Silverlight Web Part >> Add >> Navigate to the XAP file which is under Shared Documents, click OK button and our web part has been created.
Step9: The Silverlight web part has been created successfully.
Cheers,
--aaroh
Download the source here.
Reference:


1 comment:
Thank you so much for a nice article. Very easy to get to work :o)
Post a Comment