Hi All,
In Jan 2020 SQL PASS Meetup I spoke on how to use Power Apps with data in Azure SQL Server.
SQL Meetup link
Slide Deck for how to use Power Apps with Azure SQL Server.
These are the step by step for this blog post.
I will split into 4 parts.
In Jan 2020 SQL PASS Meetup I spoke on how to use Power Apps with data in Azure SQL Server.
SQL Meetup link
Slide Deck for how to use Power Apps with Azure SQL Server.
These are the step by step for this blog post.
Business Requirements
- Contoso Purchased Microsoft 365 subscription and has corporate Data on Azure SQL Server
Problem Statement - Staff needs to access the data using their mobile devices
- They should be able to perform in a quick UI for
- Creation
- Reading
- Updating
- Deleting (CRUD )
I will split into 4 parts.
- Set up Azure SQL Server DB
- Choose SQL Server Tables within Power Apps
- Creating PowerApps and SQL Server App
- Final touch-ups on Power Apps
- Set up Azure SQL Server DB
- Refer to how to Microsoft documentation Create a new Azure SQL Server Database.
- I will provide screenshots for this setup
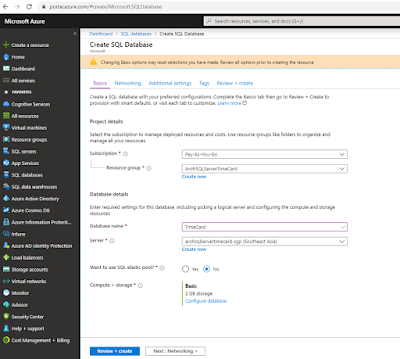
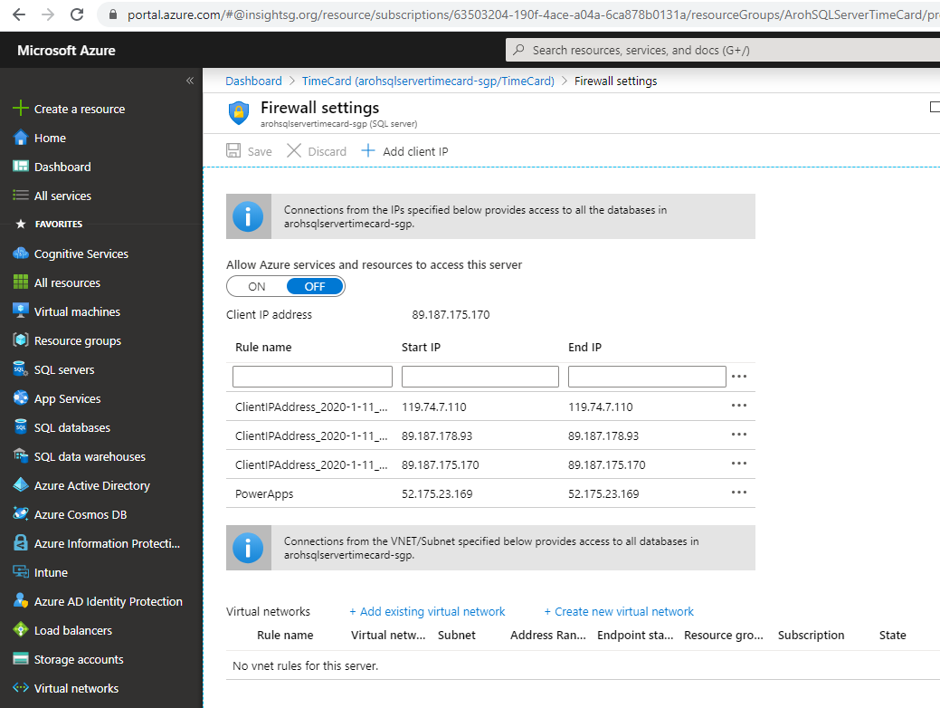
Create SQL Server Database - The firewall rules have to be added so that we communicate with SQL Server Management Studio (SSMS) and also for Power App that will use in the next steps.

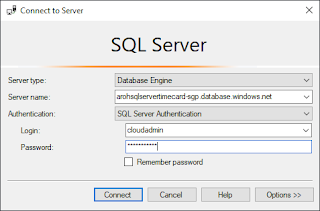
Azure SQL Server Firewall Rules - Connect SSMS locally and enter your Azure SQL Server credentials


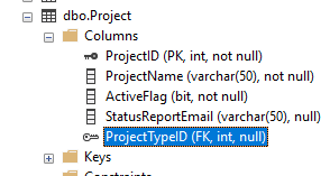
- In our example, we are using 2 tables
First is Projects table and ProjectType table as shown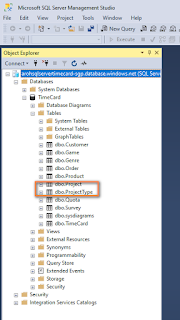
- The Projects table has a foreign key reference to the ProjectType table.


2. Choose SQL Server Tables within Power Apps
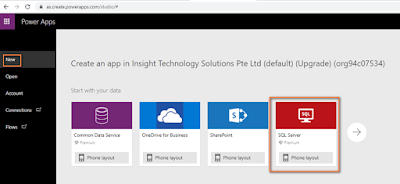
- Go to make.PowerApps.com site.
- Start with Data and we will use SQL as our data source.
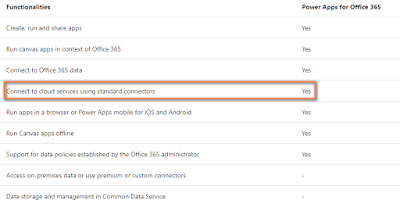
- LICENSING for Power Apps
I am using Office 365 E3 license and Power Apps comes with this license. However, integrating with Azure SQL Server, Cosmos DB, you need Power Apps P1 / P2 license.
I am using Power Apps P1 30 days trail.
Office 365 with Power Apps license comes with standard connectors such as SharePoint Online, Excel, Onedrive
You can refer to Power Apps pricing on Microsoft Site. (as of 01 Feb 2020)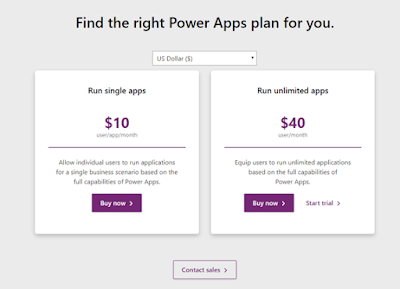


3. Creating PowerApps and SQL Server App
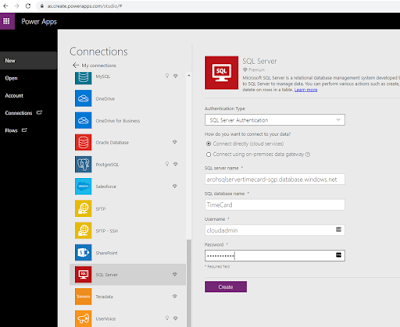
- Power Apps have many in-built connectors and we will use SQL Server. Use SQL Server Authentication and use the same credentials that we did for connecting to SSMS.
NOTE: Must add PowerApps client IP and add to Azure SQL Server.
- Select the Project table and select Connect.

- Power Apps will make 3 screen format (Web, Tablet and Mobile)
- Power Apps has a default naming for the controls and you as citizen developer can change the naming convention

- We can rename the default controls that are more meaningful for the user.
For e.g. instead of [dbo].[Project] label you can rename it to more meaningful such as Project Lists.
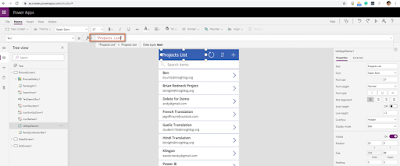
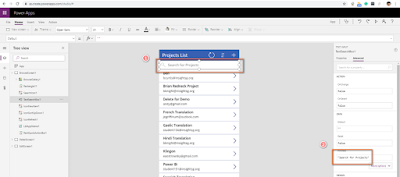
- HintText:

In the Search box, under Advanced settings, you can type the Search for projects.
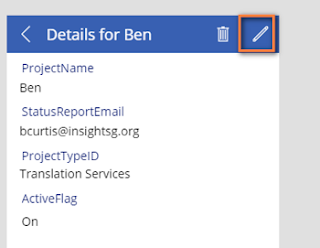
- Click on ALT + > on the Power Apps app to navigate to the detail screen.

- Dynamic Labels:
You can make the [dbo].[Project] label to dynamic and modify to a Details page with the current project as shown:
"Details for " & BrowseGallery1.Selected.ProjectName
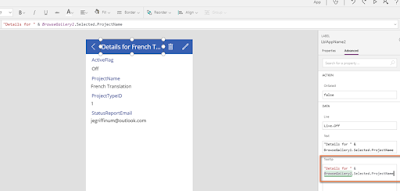
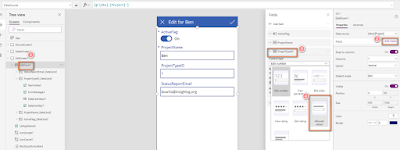
- Tooltip:
For French Translation in the details page on the details page, the text is truncated.
- Copy the Text and paste on Tooltip textbox.
- Reorder fields:
You can reorder the fields to your business requirements.
and can be reordered as this

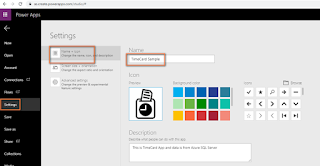
- Saving App
Go to File >> Settings >> choose a description name, icon and description of the app.
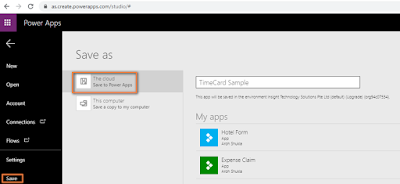 and then select Save button to Save the Power App.
 You no need to publish the app as we need to make some changes.
NOTE: Save Power Apps for the first time otherwise you might lose your changes. - Creating a new item
In the new Edit / Item Screen we again reorder the screen.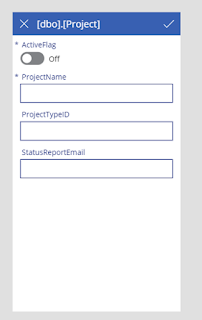

Let's add a new item for Project app
Now project type ID text field and use can put any number. But In the project type table, we have only 3 project type ID. This may lead to user error and inconsistent app.
- Furthermore, Projects and ProjectTypeID have foreign relationships.
- There are 2 issues.
- a) It has data quality issue as the user can add any number for ProjectTypeID.b) The User should be to view the Project Type and not the Project Type ID.
- To achieve this in our Power Apps design, we have to add the Project Type table in our app and user Power Apps functions
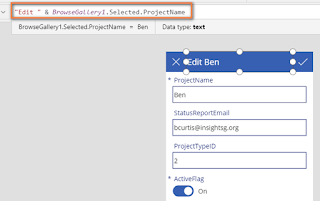
- Fix the Edit Screen first
Instead of [dbo].[Project] in Edit screen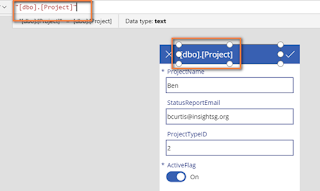
Use the similar code that we have used it earlier.
"Edit " & BrowseGallery1.Selected.ProjectName
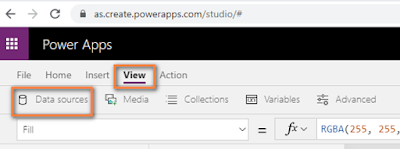
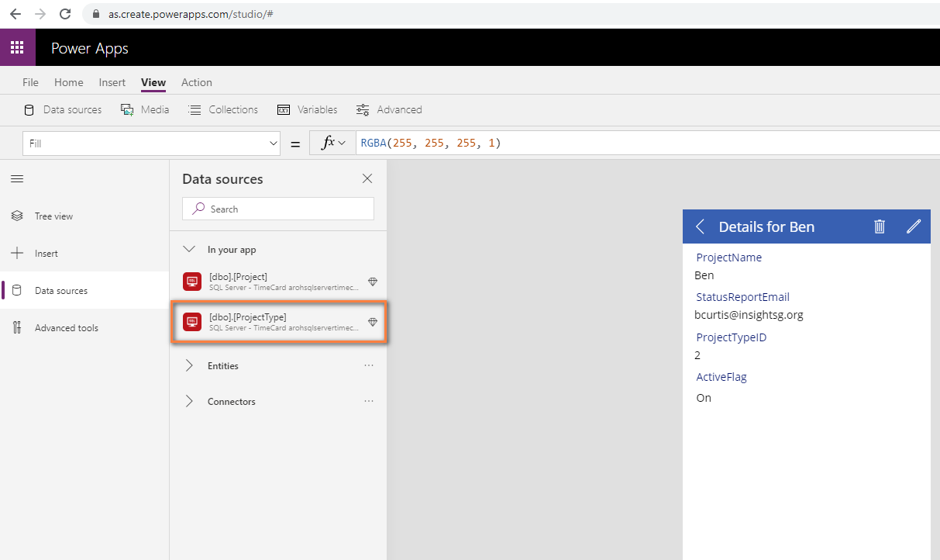
- Adding a new data source
Under View click on Data Sources.
Under Data Source, search for SQL, select SQL Server and then select SQL Server TimeCard data source.

Select ProjectType and click on Connect.

and now we have another table in our app.

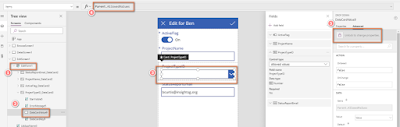
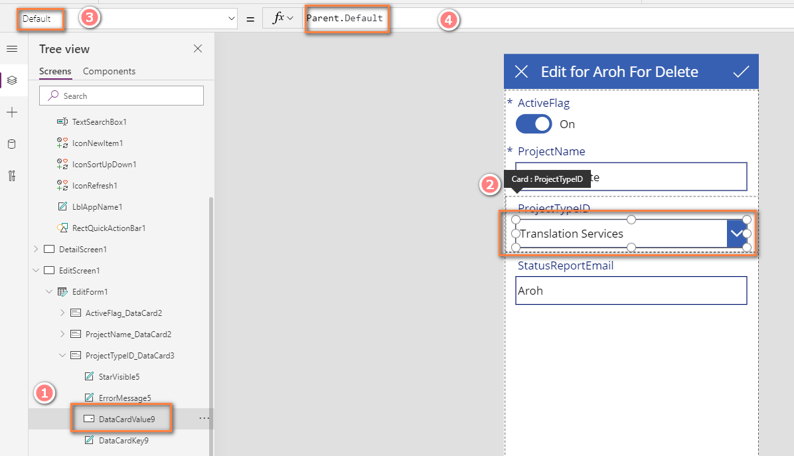
- Details screen - ProjectTypeID
End User does not know the project ID and they should be knowing the project name instead. However, our current Edit screen’s ProjectTypeID is a text field and we need to change the app to change the text field to a dropdown list. In the Detail screen, we need to change the Project Name, which is in the ProjectType table in Azure SQL Server.

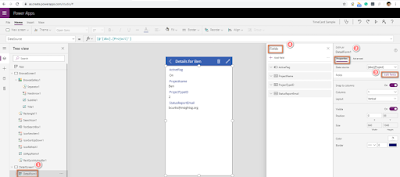
- Select the ProtectTypeID Card (03), The text field i.e. Parent.Default (4) can’t be edited in the above screenshot. Therefore, select the unlock the change properties under the advanced tab (5).
- Once the ProjectTypeID data editable, instead of Parent.Default we can use Power Apps expression.

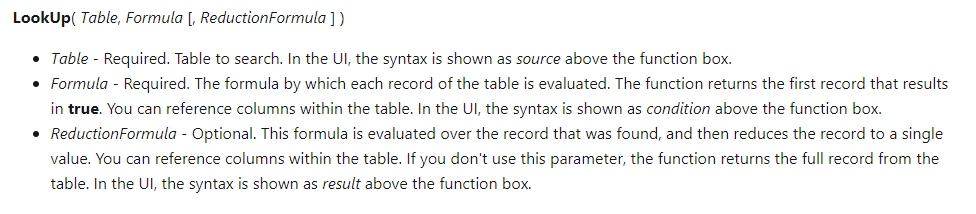
- We will use Lookup function as follows:
LookUp('[dbo].[ProjectType]', ProjectTypeID = ThisItem.ProjectTypeID, ProjectTypeName)
 The project system ProjectTypeID = ThisItem.ProjectTypeID is similar a join in T-SQL.
- Change ProjectTypeID field as a dropdown fieldIn Edit Form, in Edit Fields, changed ProjectTypeID to a dropdown.
Now we have a dropdown field for the ProjectTypeID Datacard for the DataCard3
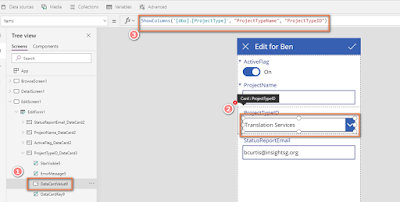
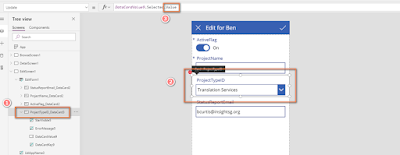
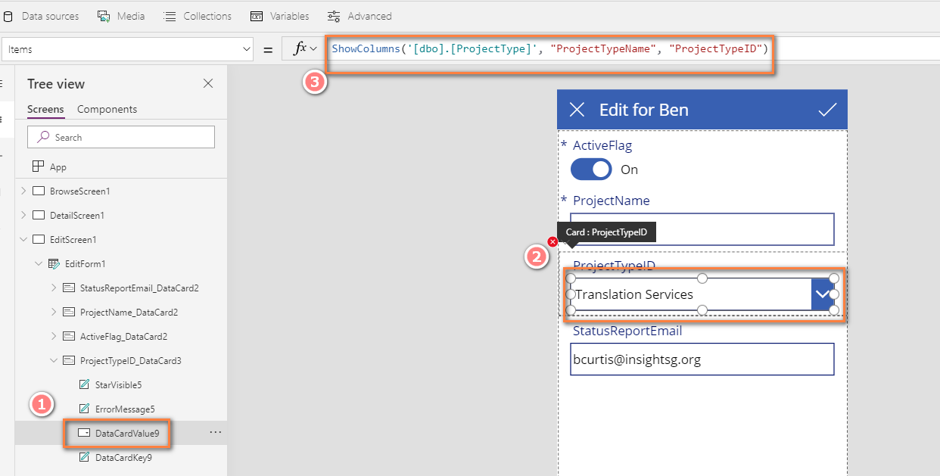
- In the ProjectTypeID i.e DataCardValue9 (1) which has Parent.AllowedValues (4) is un-editable. Therefore, select the unlock the change properties under the advanced tab (5) below
and use this expression
ShowColumns('[dbo].[ProjectType]', "ProjectTypeName", "ProjectTypeID")
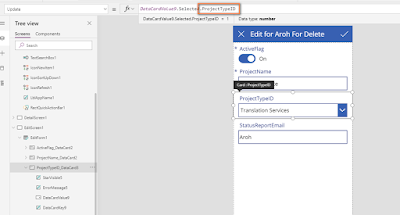
- On ProjectTypeID Datacard3, we initially used the ProjectTypeID number field.
- But we changed ProjectTypeID to a dropdown. Therefore, we have to replace value to ProjectTypeID


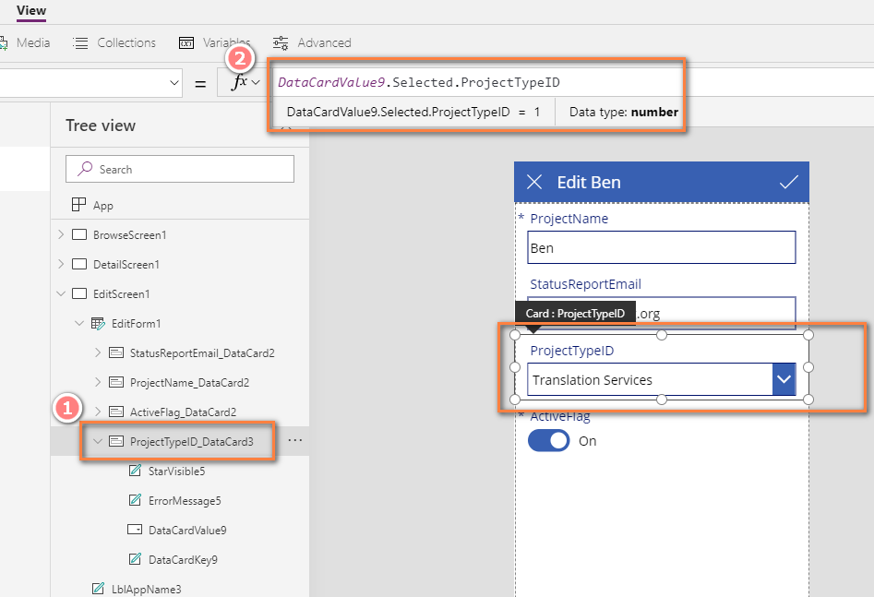
4. Final touch-ups on Power Apps
- The current app for the ProjectTypeID a dropdown list (for e.g. Translation Services value) is not editing/updating for the user.Go to Edit Screen
Let’s look at the ProjectTypeID_DataCard3 value and in Update properties, it showing up DataCardValue9.Selectected.Value which is incorrect and getting a red icon on this datacard The reason for that we stored ProjectTypeIDs in our project table. Let's make a minor change to DataCardValue9.Selected.ProjectID as shown
- Also, Edit form’s DataCardValue9 is showing default value in the dropdown from this

to write the following expression
LookUp('[dbo].[ProjectType]', ProjectTypeID = ThisItem.ProjectTypeID, ProjectTypeName)


I hope this Power Apps tutorial helped you.
--Aroh

